For Fall 2024, I am taking an image processing class. This assignment is to play around with diffusion models and create some optical illusions, as well as imlement a diffusion model from scratch.
Part A #
Project Overview #
In this project, I explored the capabilities of diffusion models using DeepFloyd, a two-stage model trained by Stability AI. The project consisted of several experiments investigating different aspects of diffusion models, from basic sampling to creating optical illusions.
Part 1: Experiments with Diffusion Models #
1.1 Sampling Parameters Investigation #
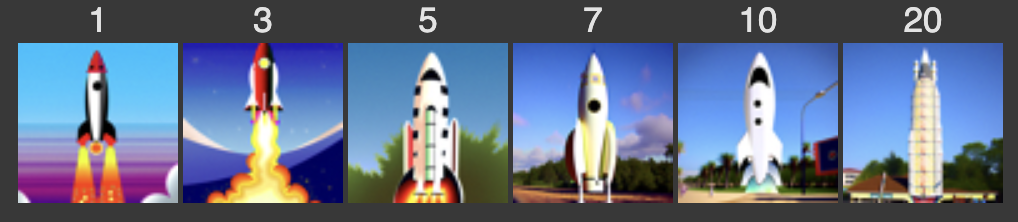
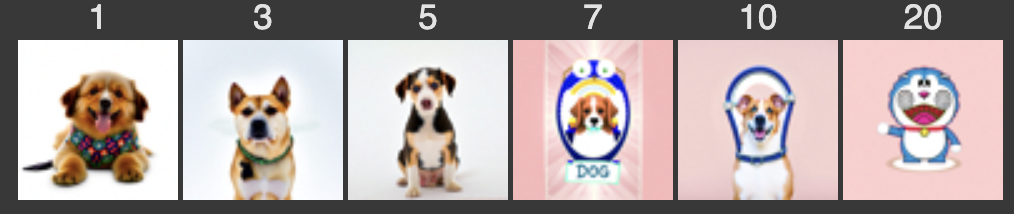
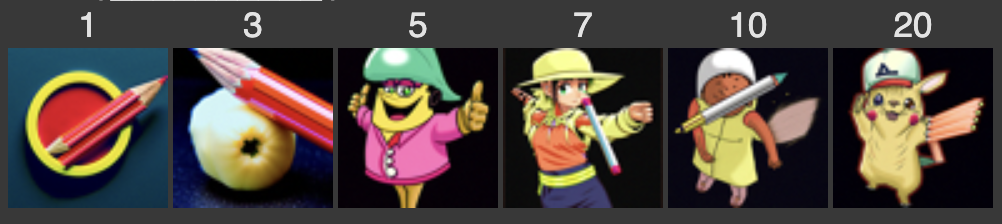
I first investigated how the number of sampling steps affects image generation quality using DeepFloyd’s two-stage process:
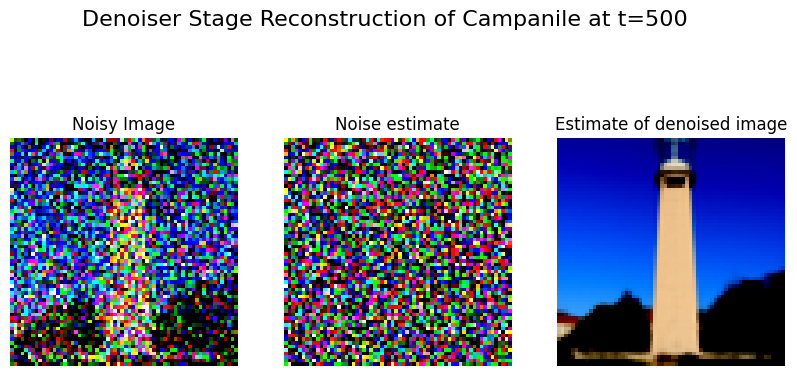
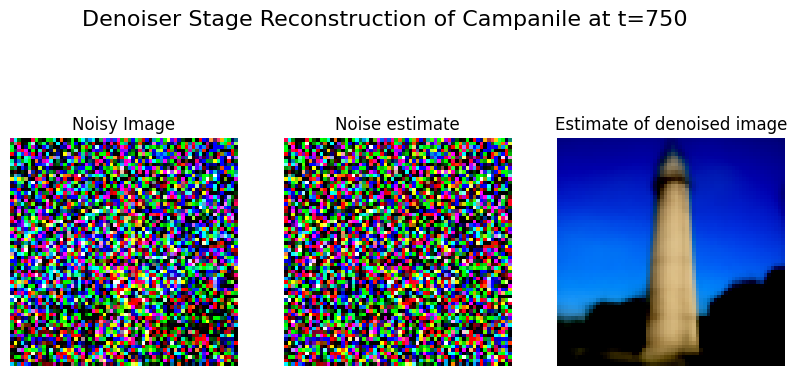
1.2 Forward Process and Denoising Experiments #
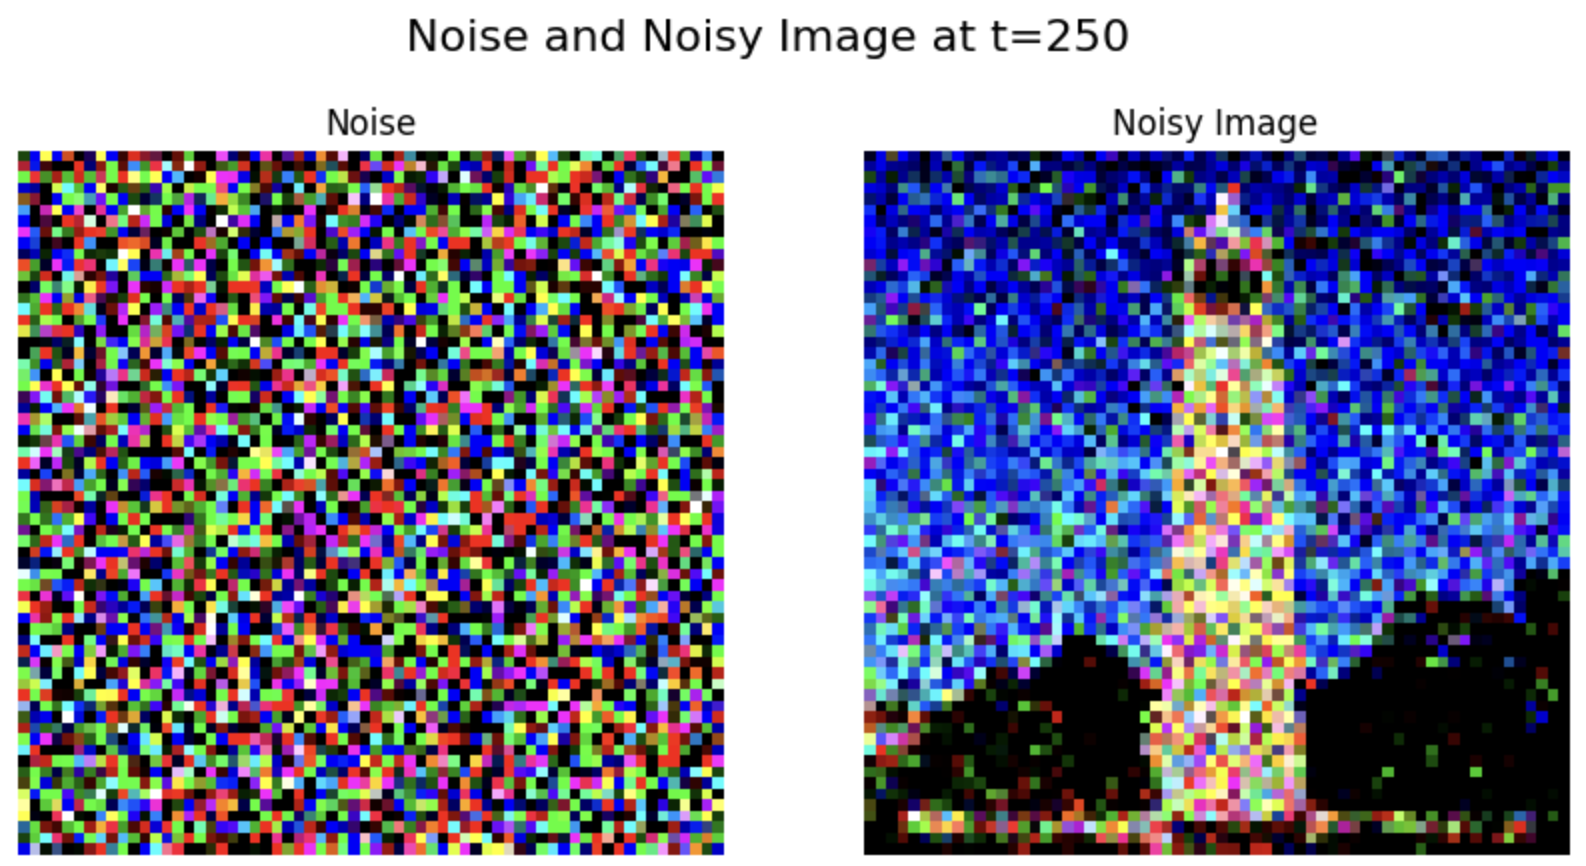
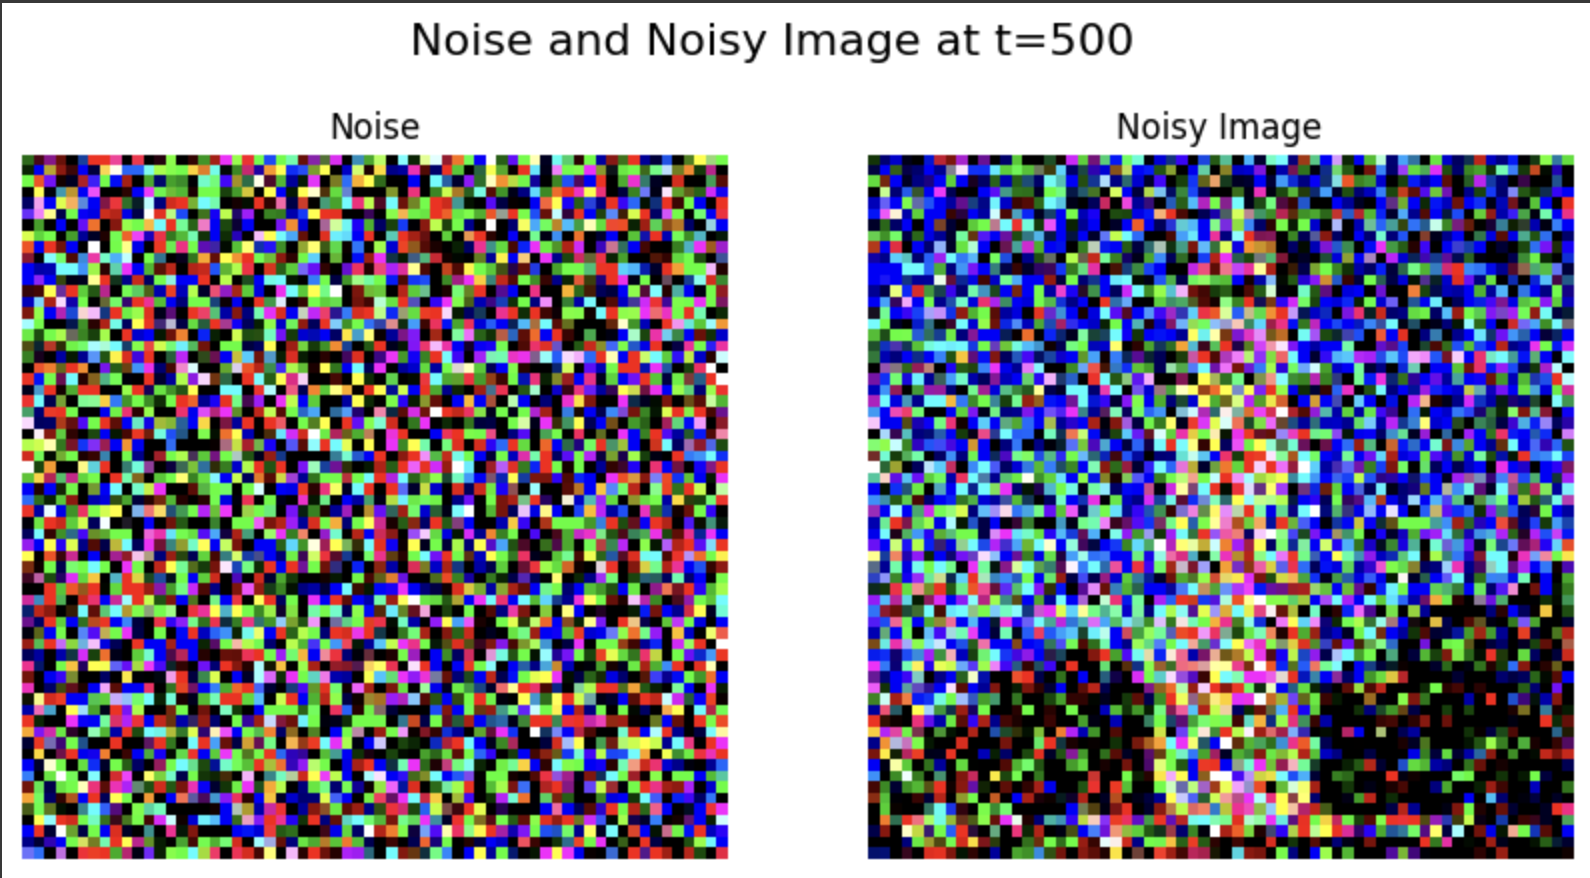
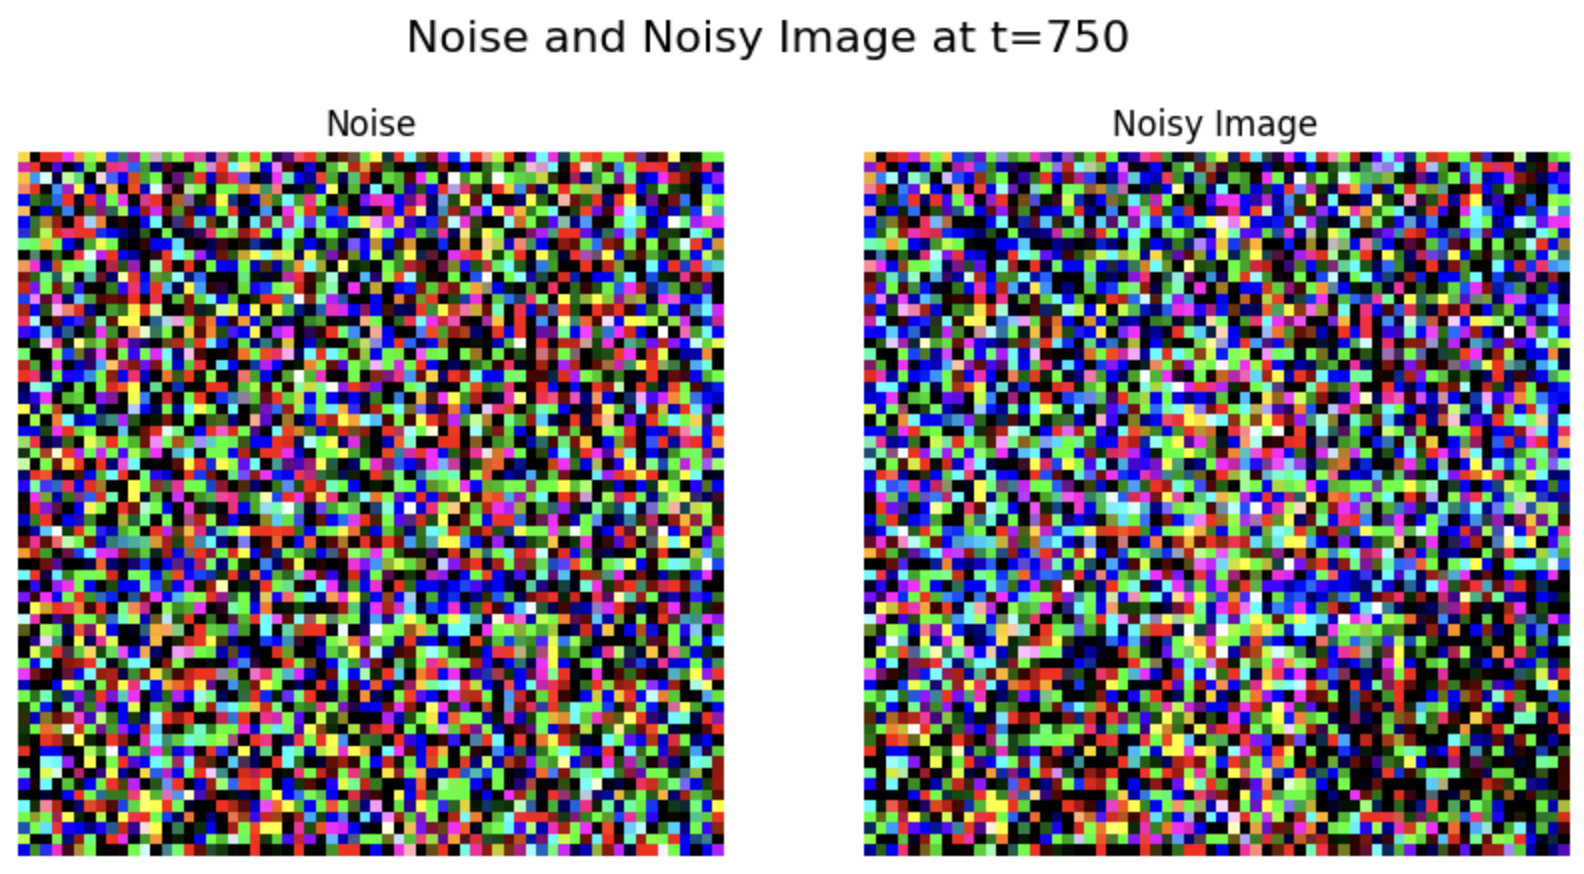
Forward Process #
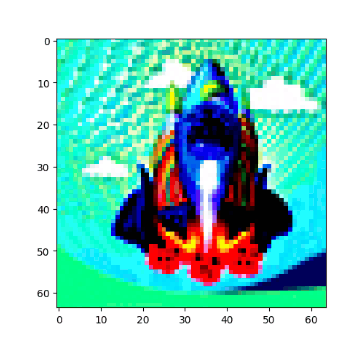
I implemented the forward process to add controlled amounts of noise to images. Using the Berkeley Campanile as a test image, I demonstrated progressive noise addition:
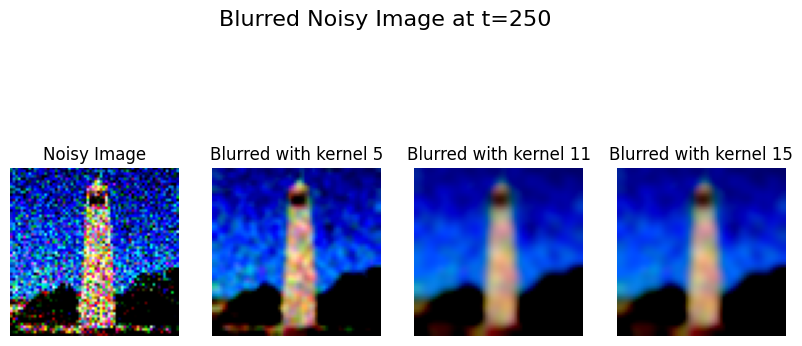
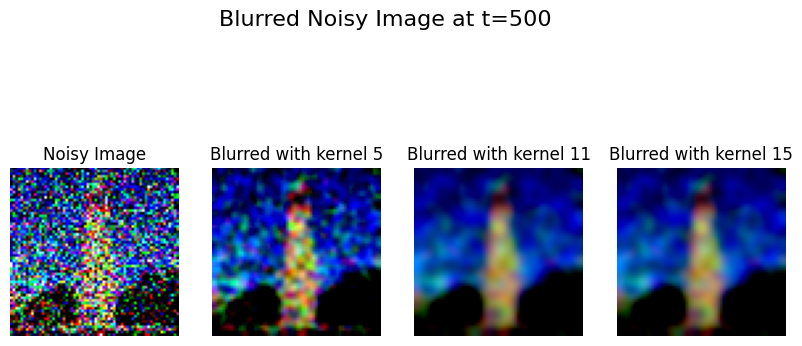
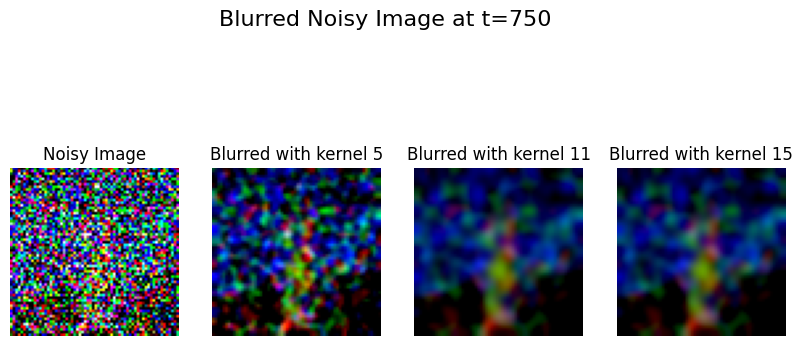
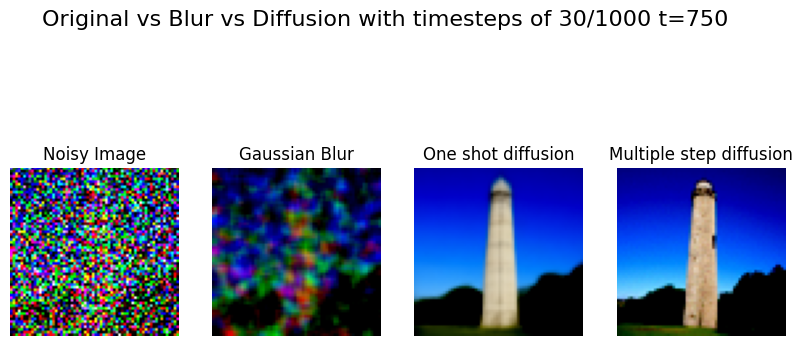
Classical Denoising (Gaussian Blur) #
Applied to different noise levels, showing limited effectiveness:
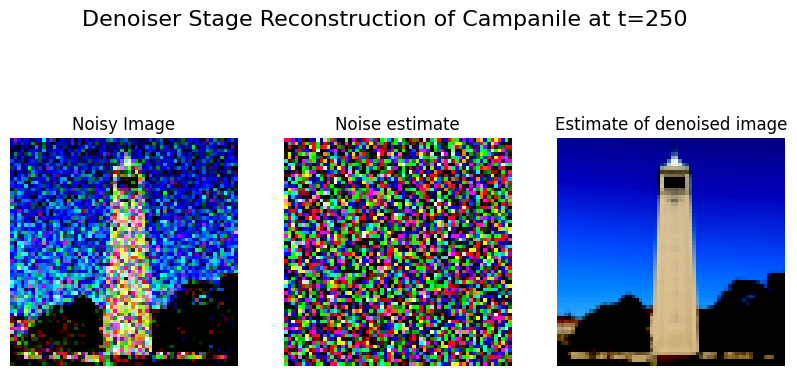
One-Step Neural Denoising #
Demonstrated significantly better results than classical methods:
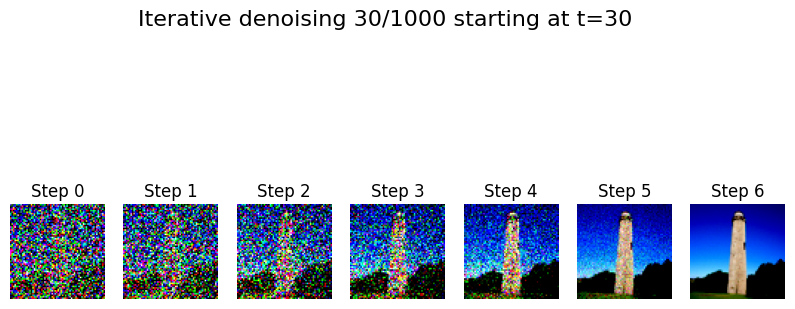
Iterative Neural Denoising #
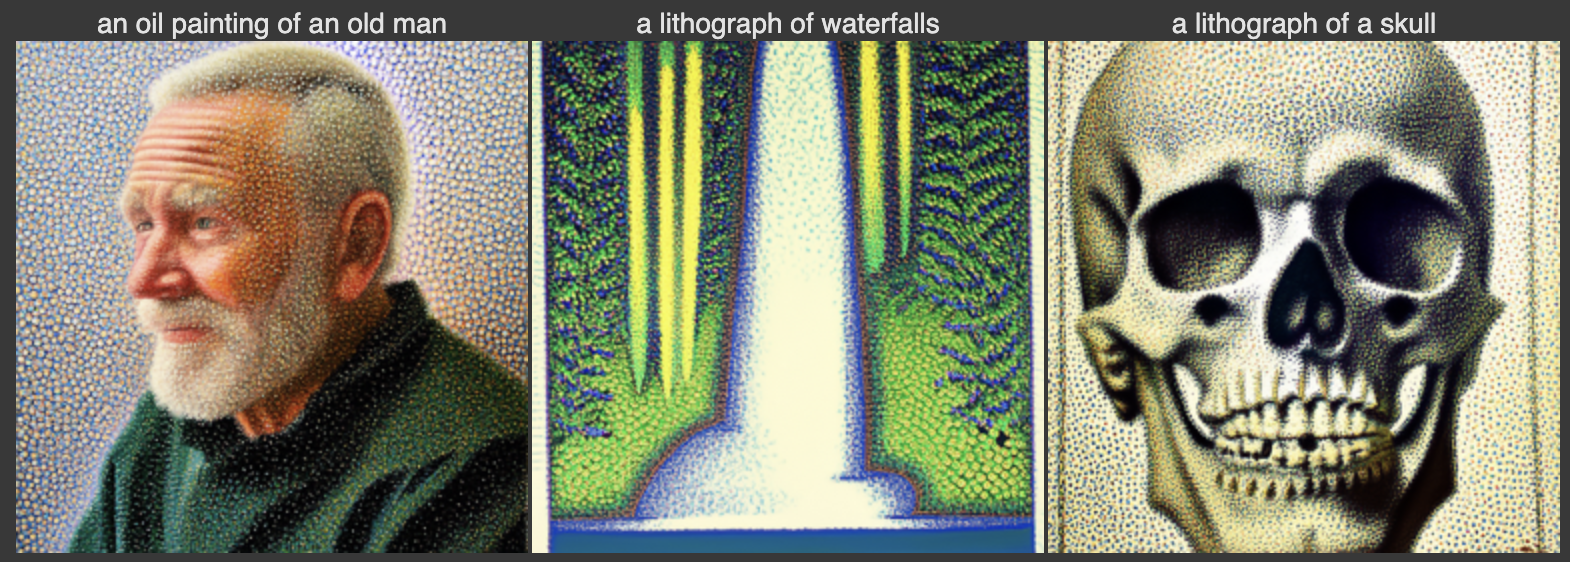
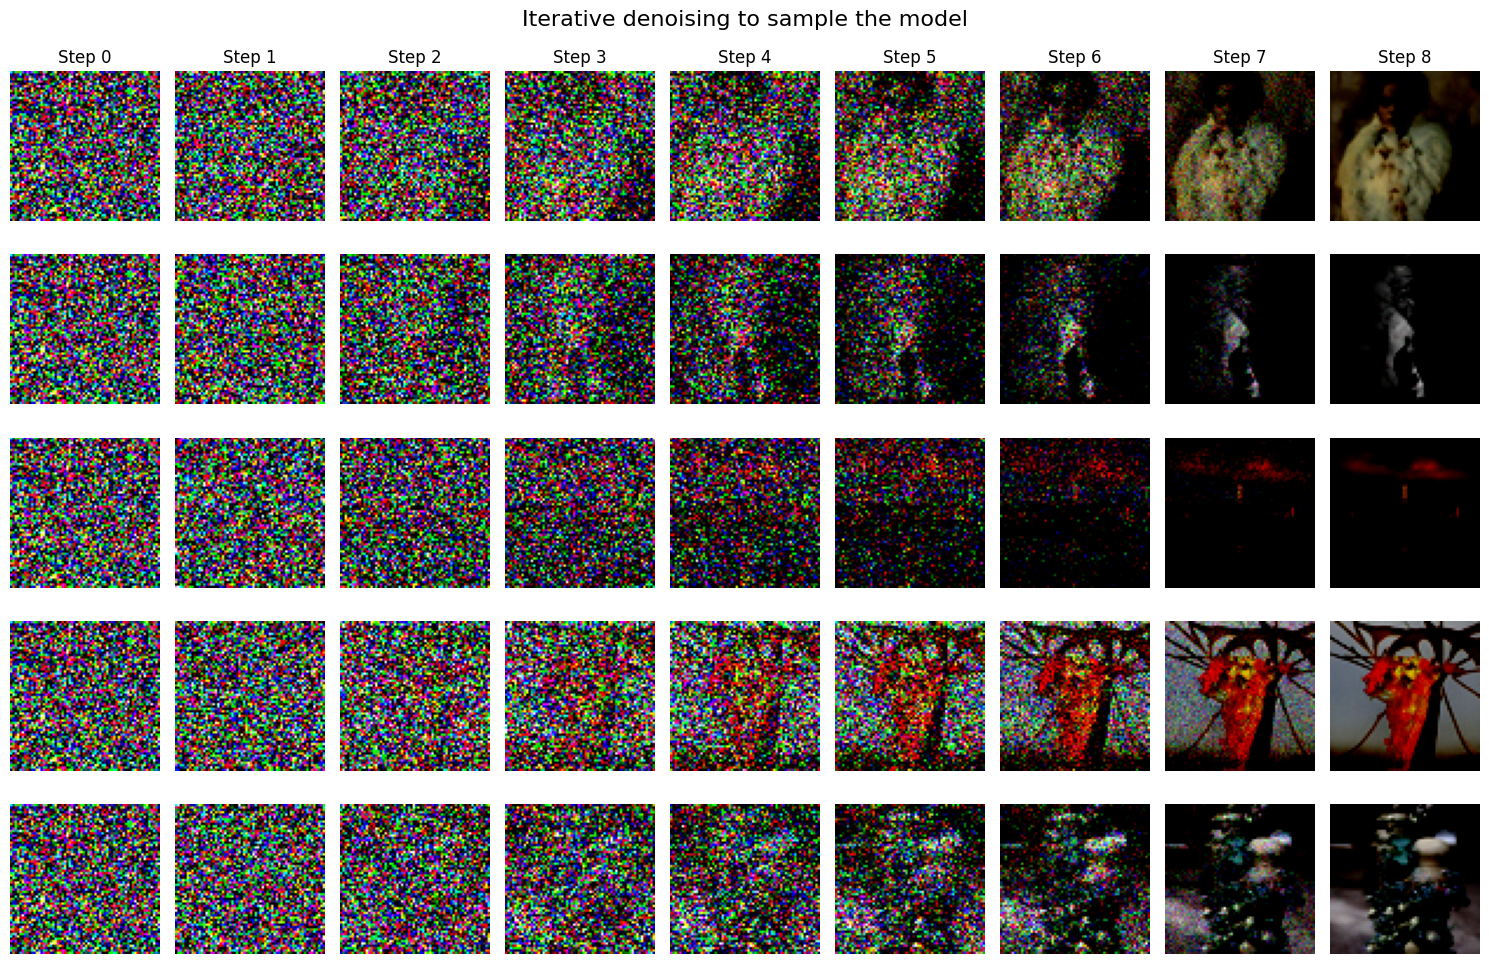
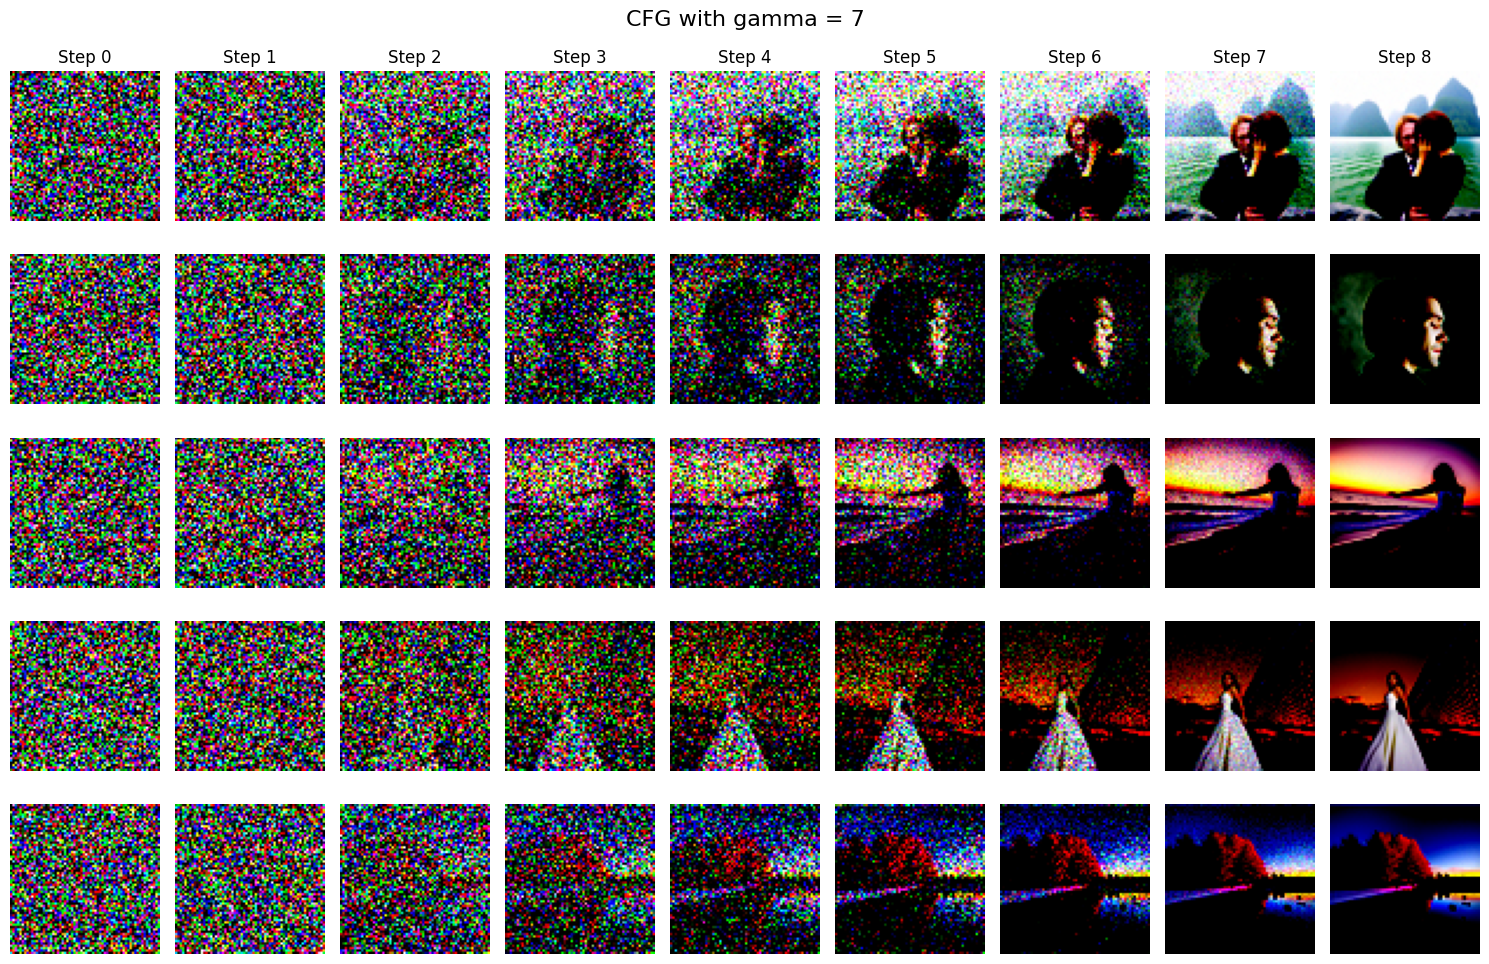
1.3 Diffusion Model Sampling and CFG #
Basic sampling results:
With Classifier-Free Guidance (CFG):
1.4 Image-to-Image Translation #
Basic Translation Examples #
Original Campanile and its translation:


Car translation:


Selfie translation:


Anime Character Translations #
Pikachu:


Conan:


Doraemon:


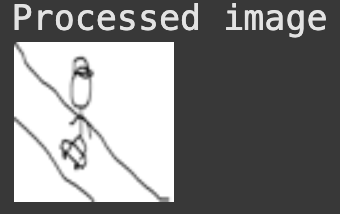
Hand-Drawn Image Translations #
First drawing:

Second drawing:
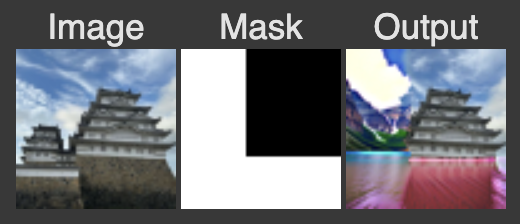
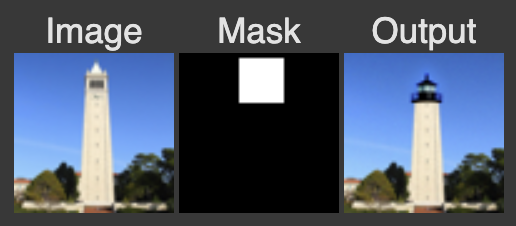
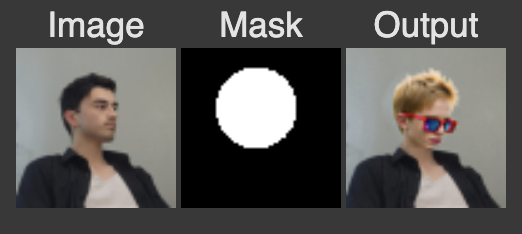
1.5 Inpainting Results #
Three different inpainting scenarios:
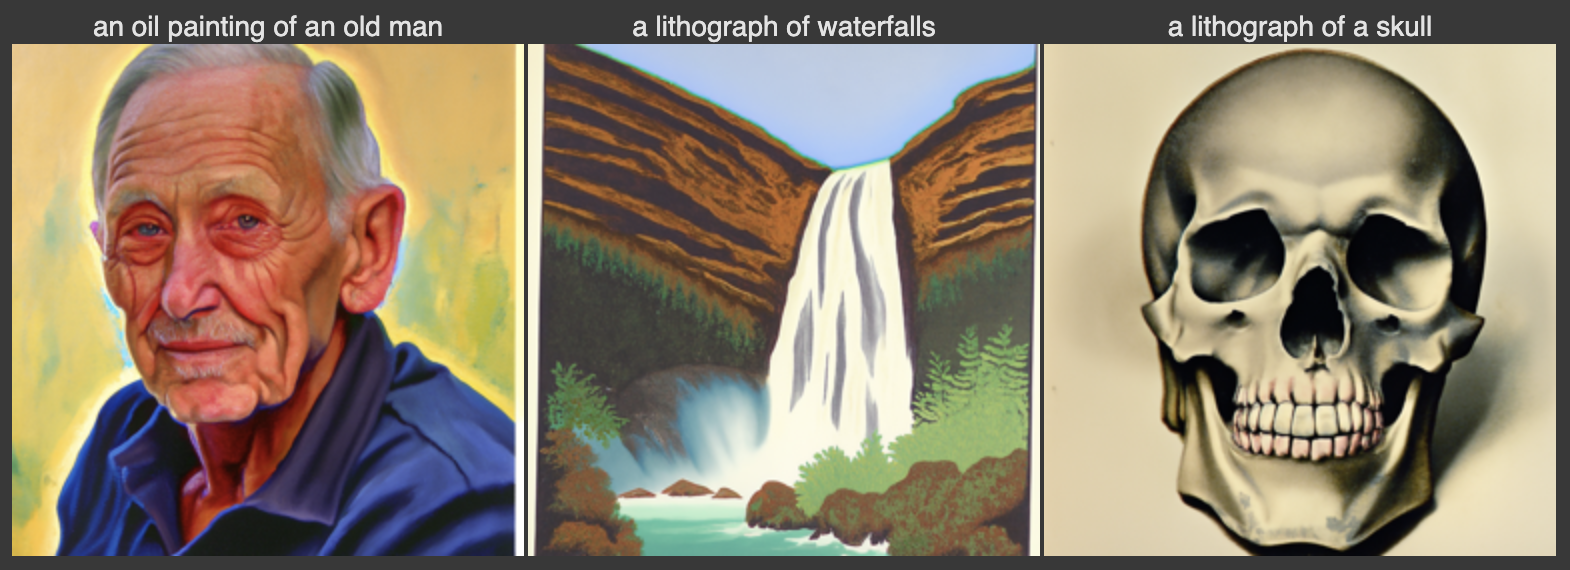
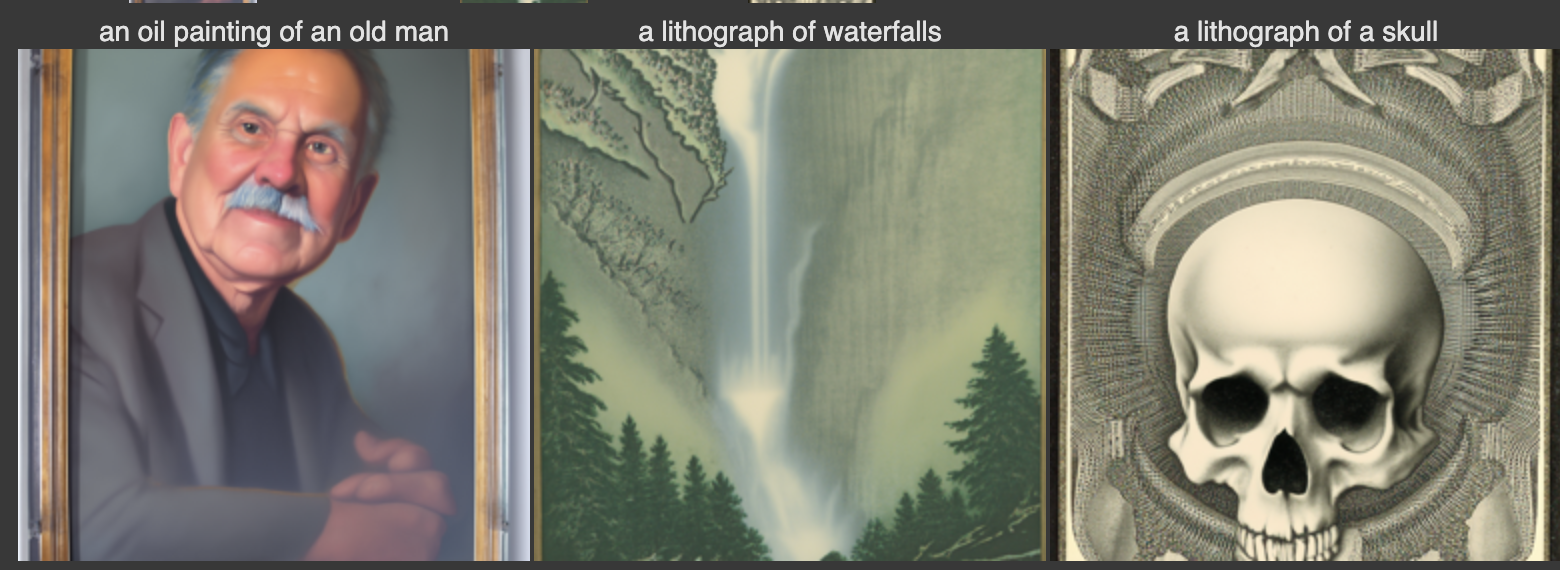
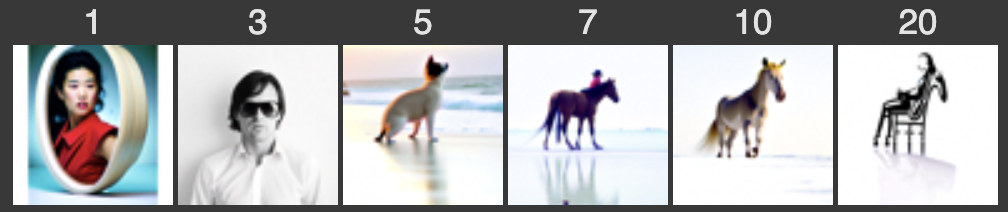
1.6 Text-Conditional Image Translation #
Progressive translations guided by text prompts:
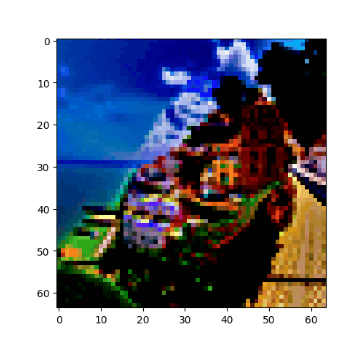
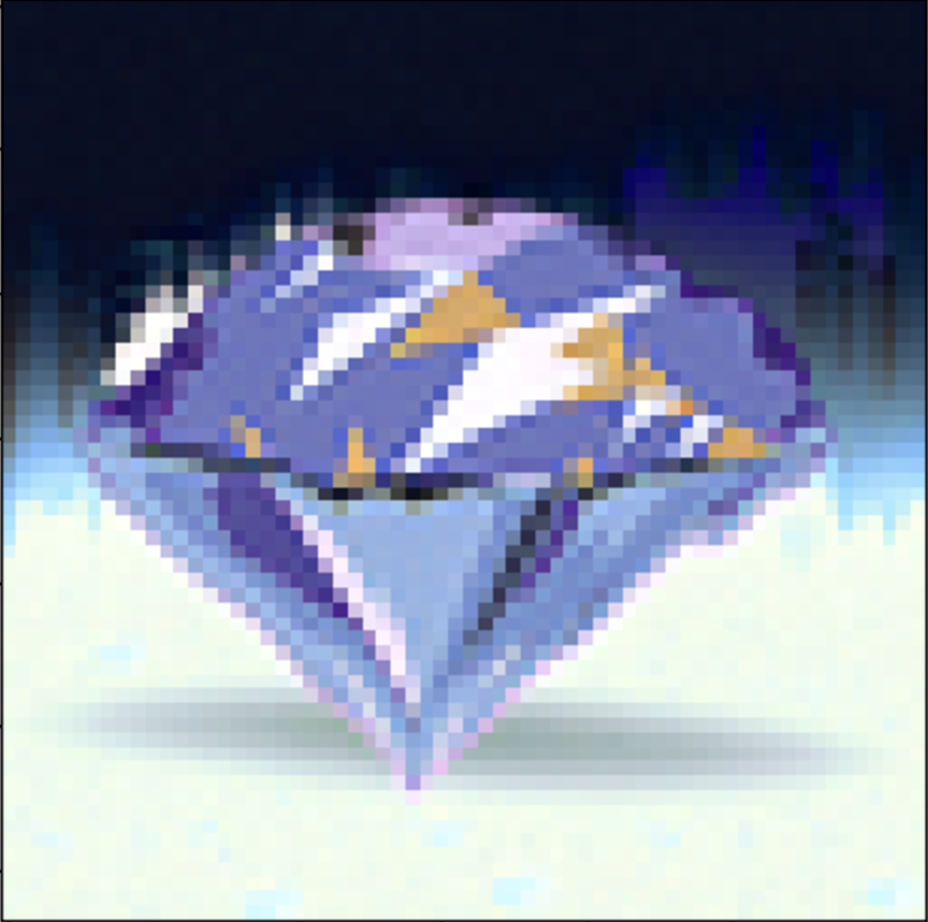
1.7 Creative Applications #
Visual Anagrams #
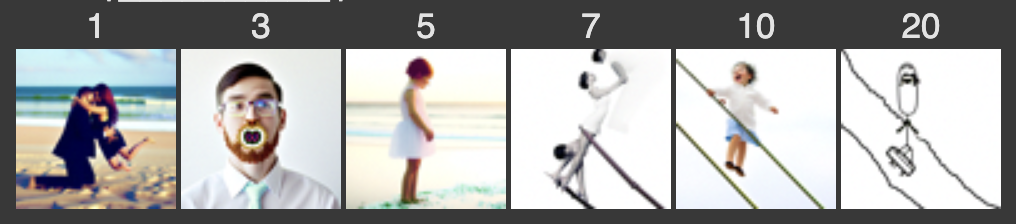
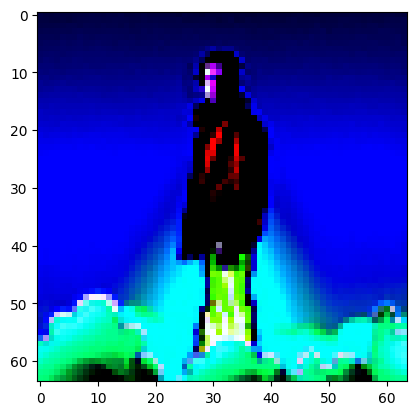
Created three sets of optical illusions that show different images when flipped:
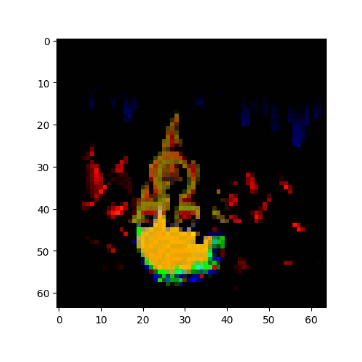
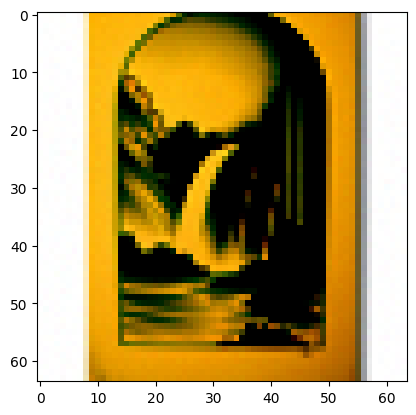
Hybrid Images #
Images that reveal different content at different viewing distances:
Technical Implementation Notes #
Throughout the project, I implemented several key algorithms:
- Forward process for noise addition
- Iterative denoising with classifier-free guidance
- Visual anagram generation using averaged noise estimates
- Hybrid image creation using frequency-based noise combination
Conclusion #
This project demonstrated the versatility and power of diffusion models in various image manipulation tasks. From basic denoising to creative applications like visual anagrams and hybrid images, the results showcase both the technical capabilities of these models and their potential for creative expression. The success of complex applications like inpainting and text-conditional image translation particularly highlights the model’s sophisticated understanding of image structure and content.
Part B: Training a Diffusion Model from Scratch #
In this assignment, I build a diffusion model from scratch and train it to generate handwritten digits.
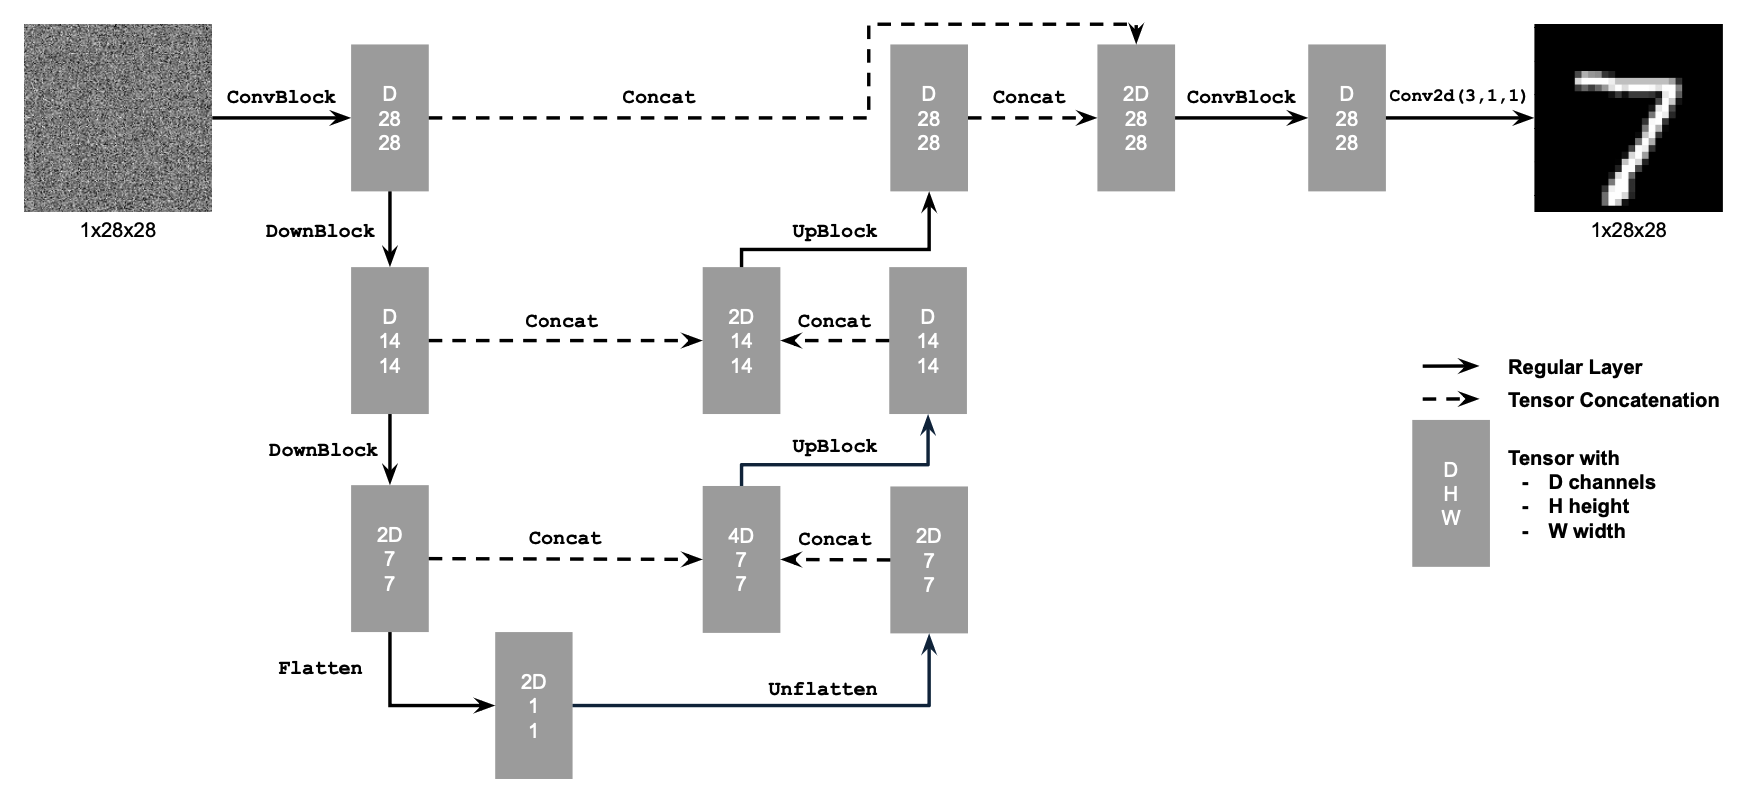
Part 1: Implementing the UNet #
The UNet architecture is as follows:
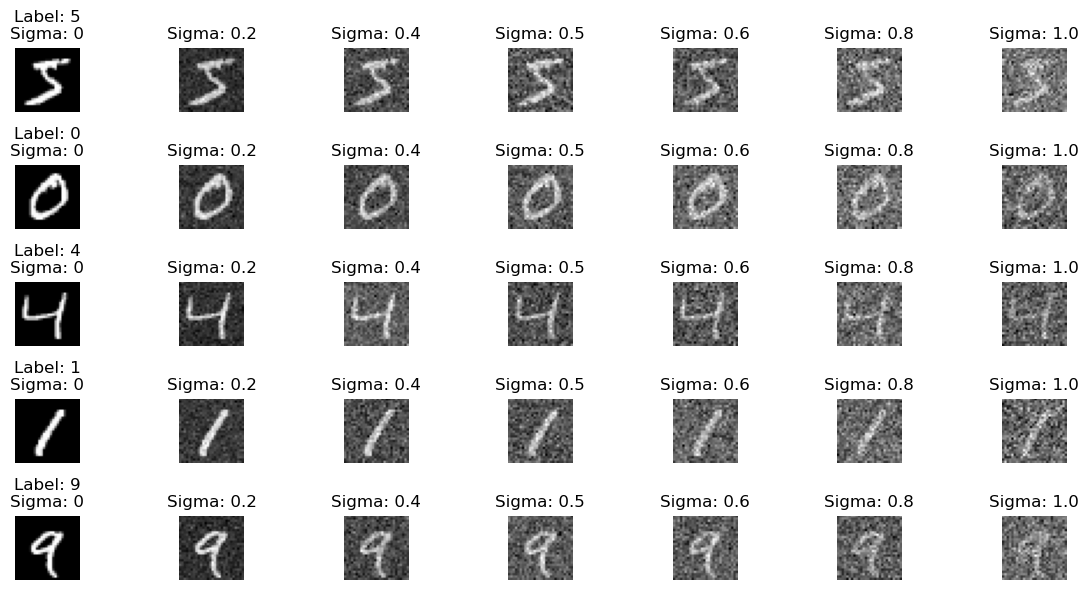
Training Data #
Training images are generated by adding variable amounts of Gaussian noise. For each training image x, the noisy image x_noisy is created as:
x_noisy = x + sigma * noise
where sigma in {0.0, 0.2, 0.4, 0.5, 0.6, 0.8, 1.0} and noise is sampled from a standard normal distribution.
Here is an example of varying noise levels:
Training Procedure #
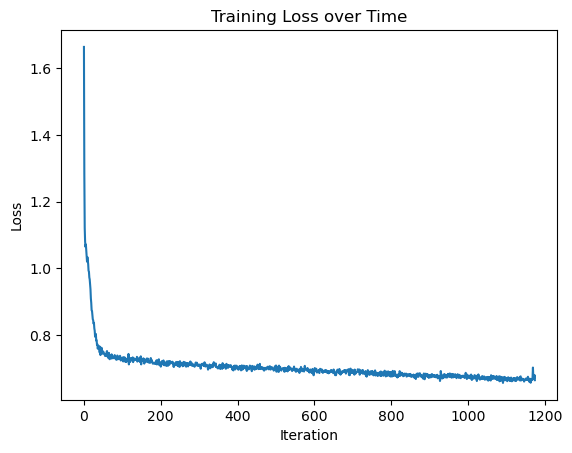
The UNet is trained to minimize the L2 loss between the predicted noise and the actual noise added. Initially, the model is trained with sigma = 0.5
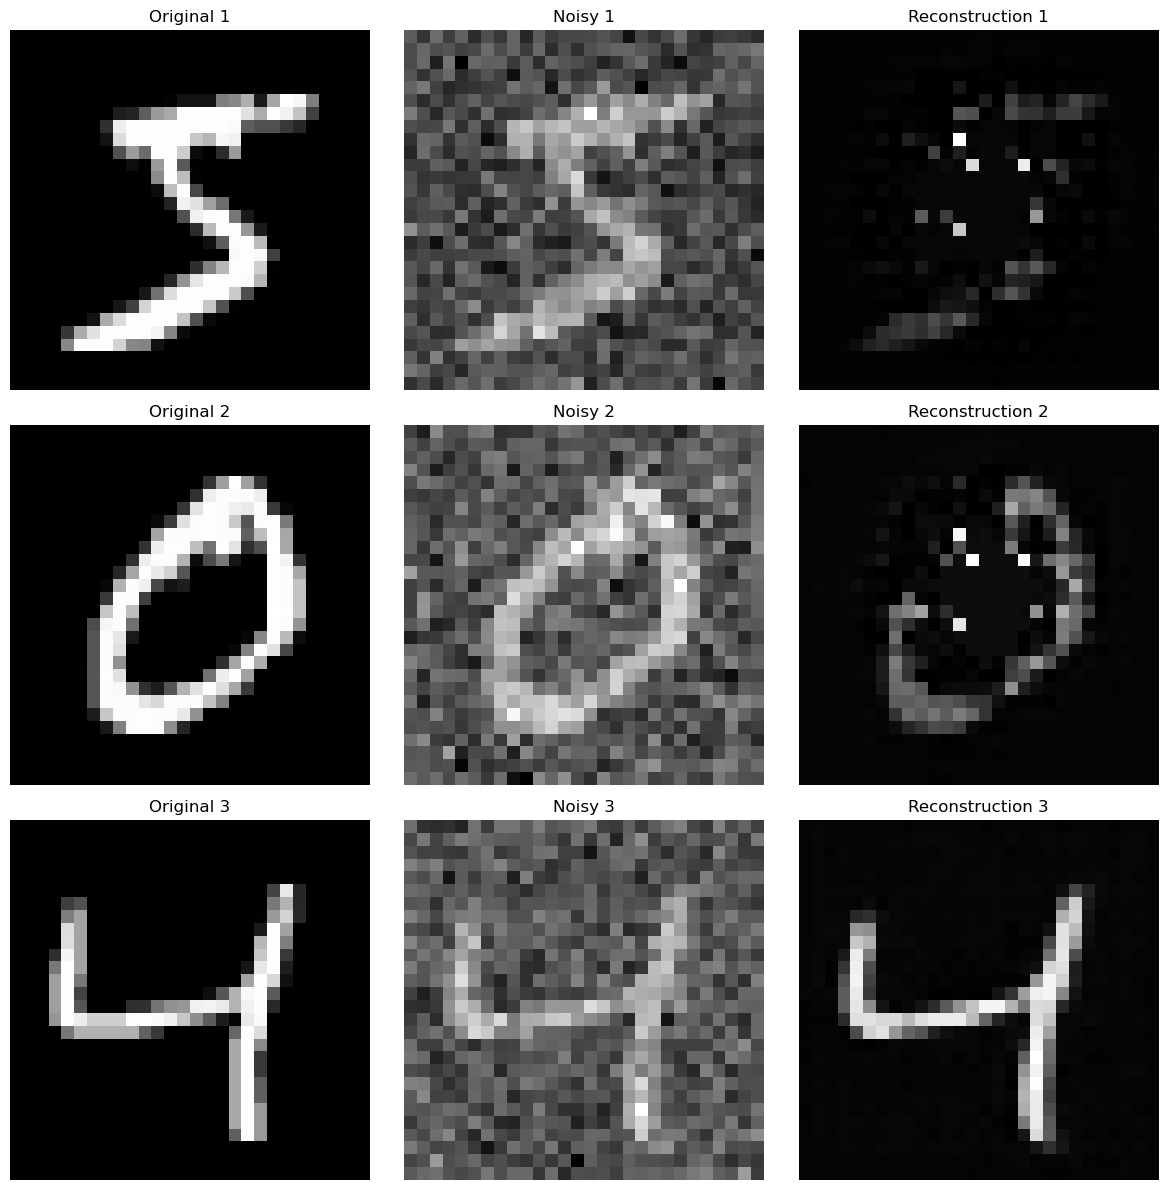
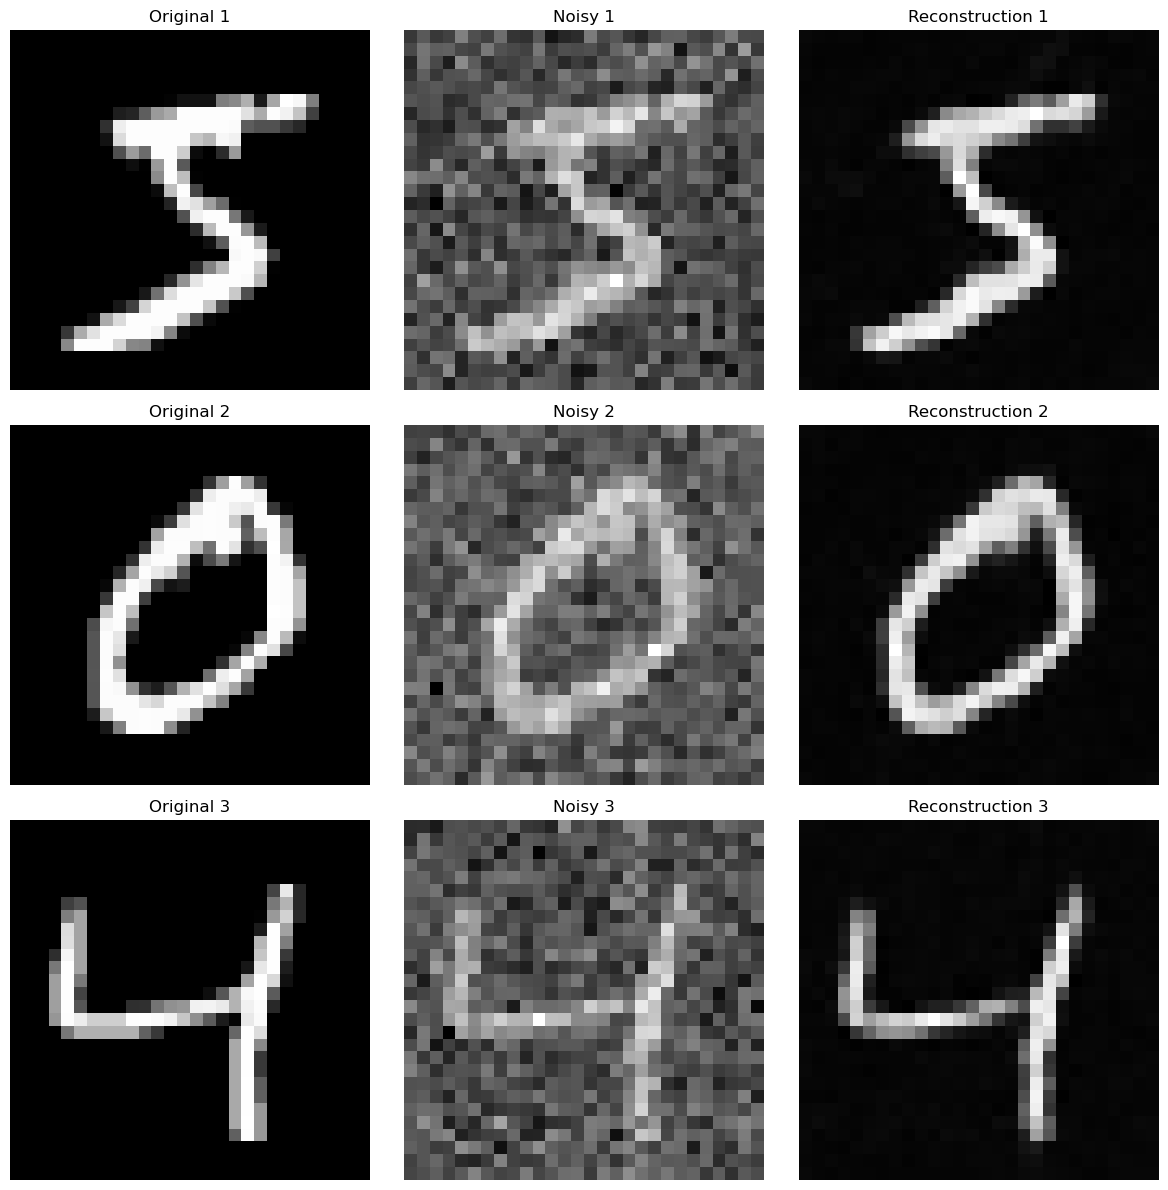
Training Results for sigma = 0.5 #
-
Loss Curve:
-
Sample Outputs:
Epoch 1:
Epoch 5:
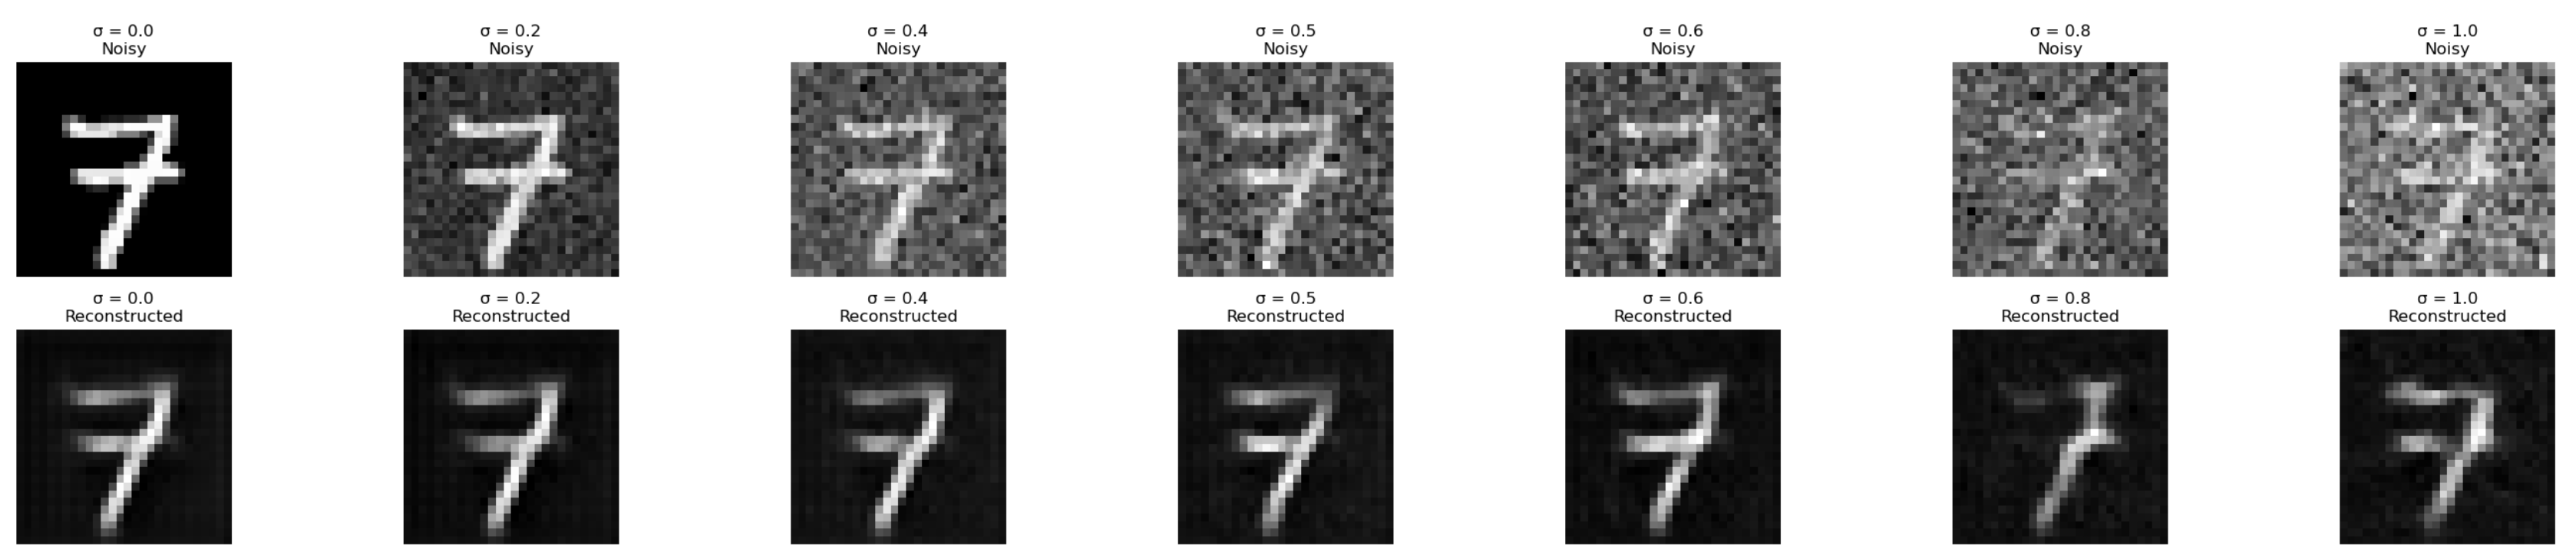
Out-of-Distribution Testing #
The trained model’s performance decreases as the noise level sigma increases beyond the training range:
Part 2: Training a Diffusion Model #
In this section, I extend the UNet model to handle time-conditional noise levels, enabling a full diffusion model.
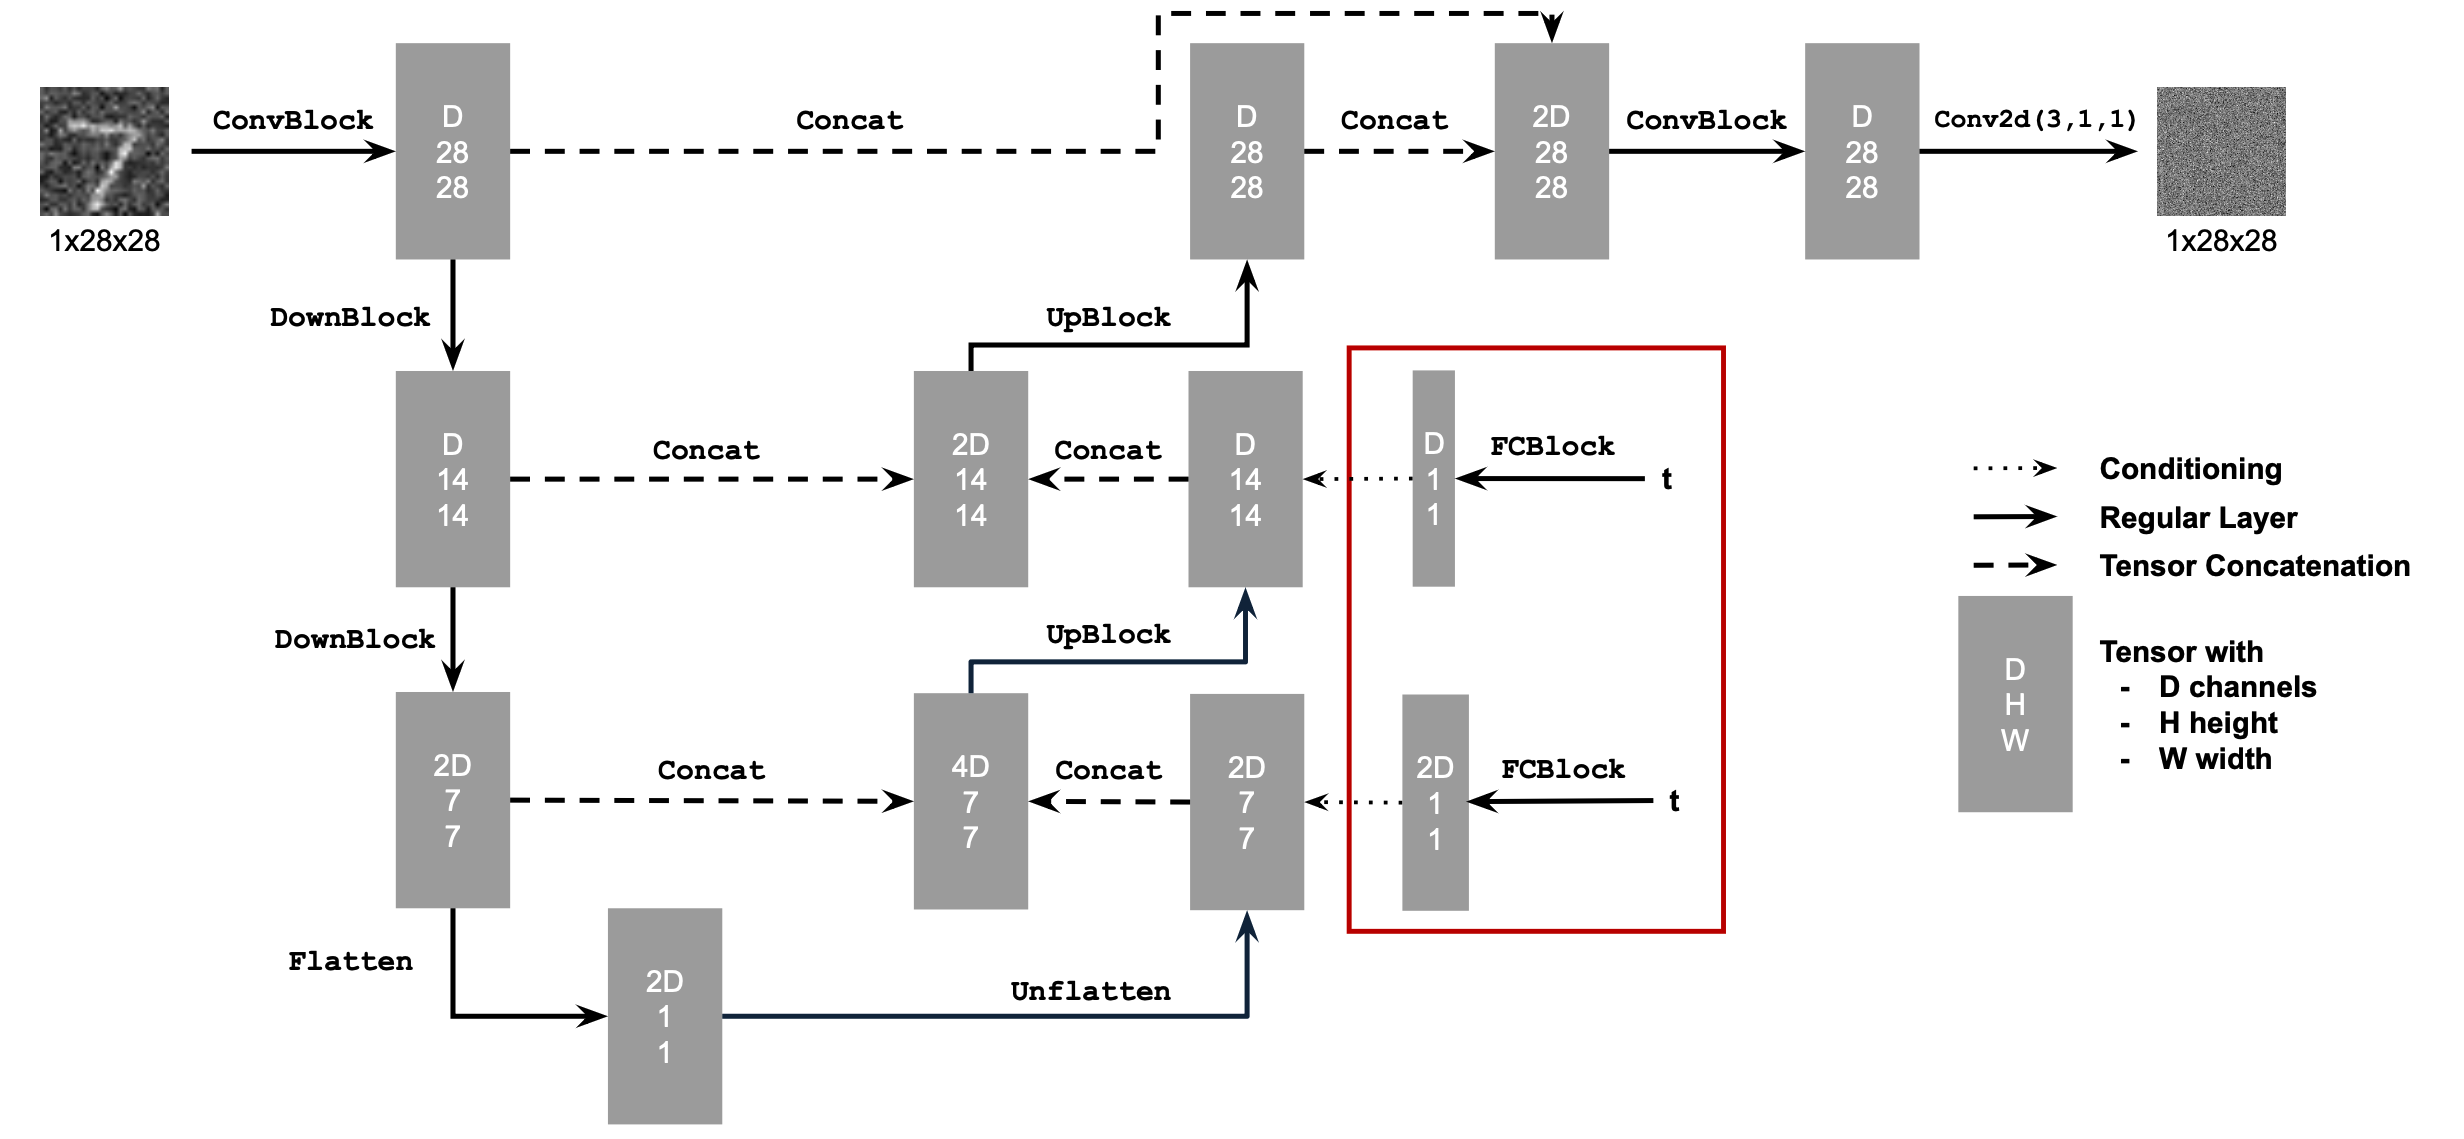
Time-Conditioned UNet #
The model is modified to include the timestep t as an additional conditioning input. t is normalized to the range [0, 1], embedded using a fully connected layer, and injected into the UNet’s architecture.
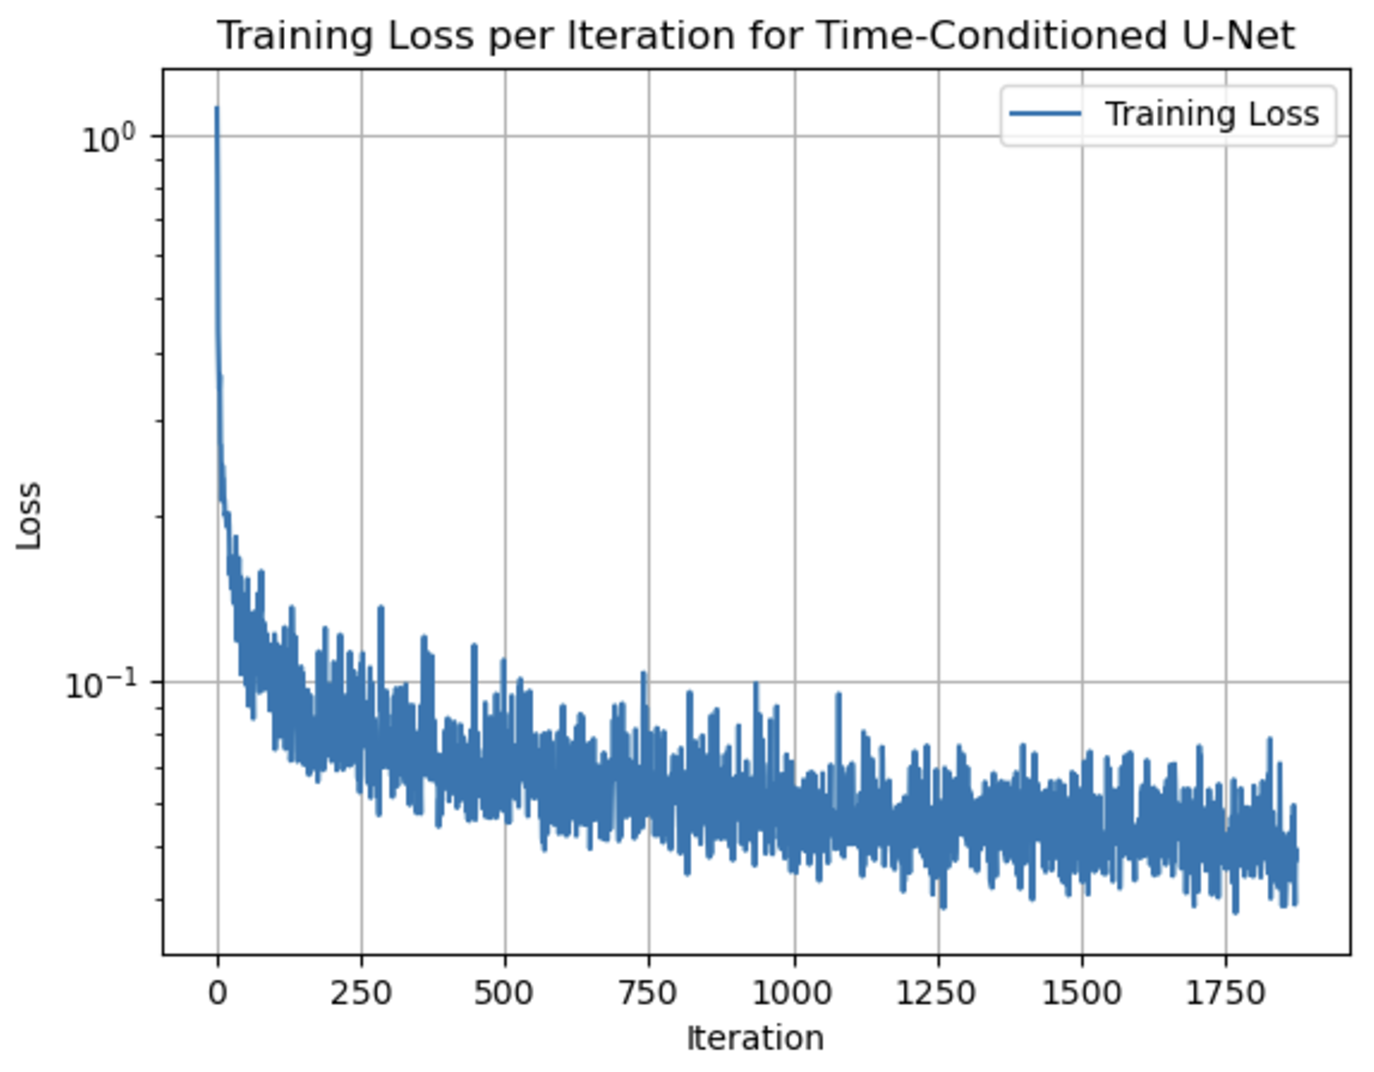
Results #
-
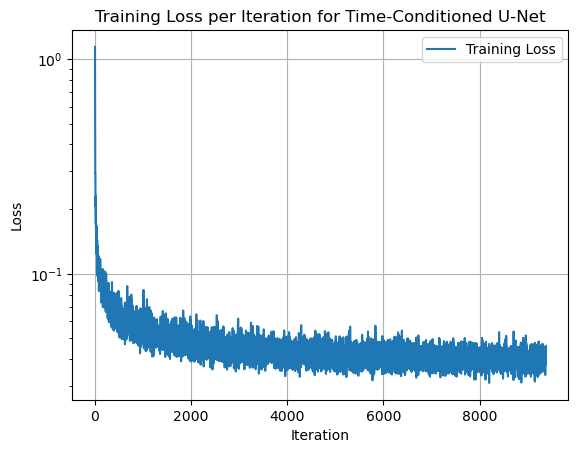
Training Loss Curve:
-
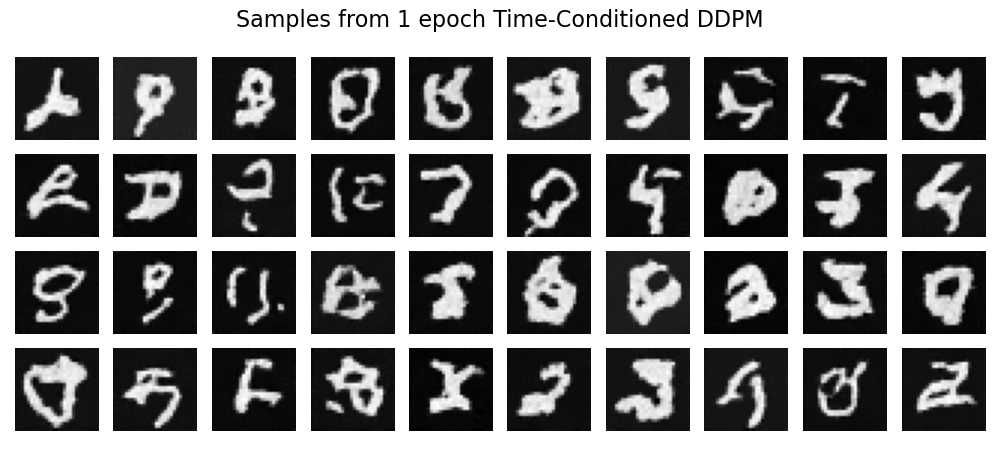
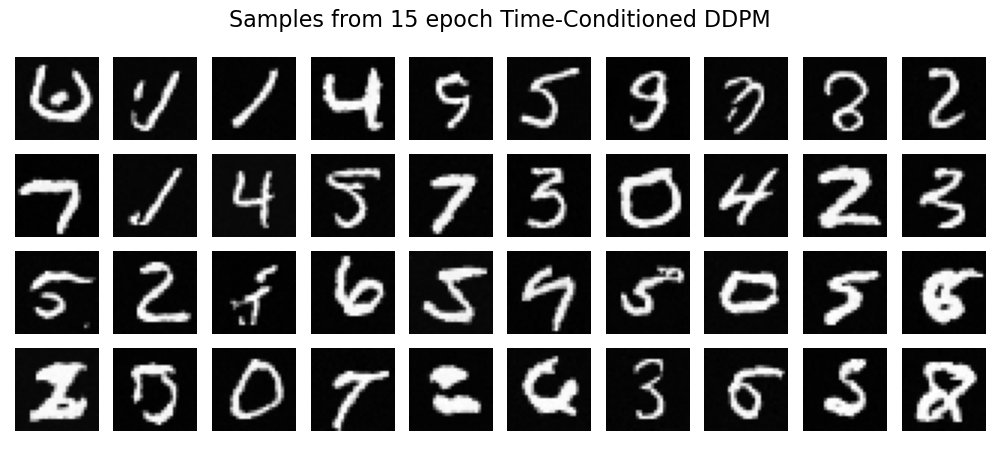
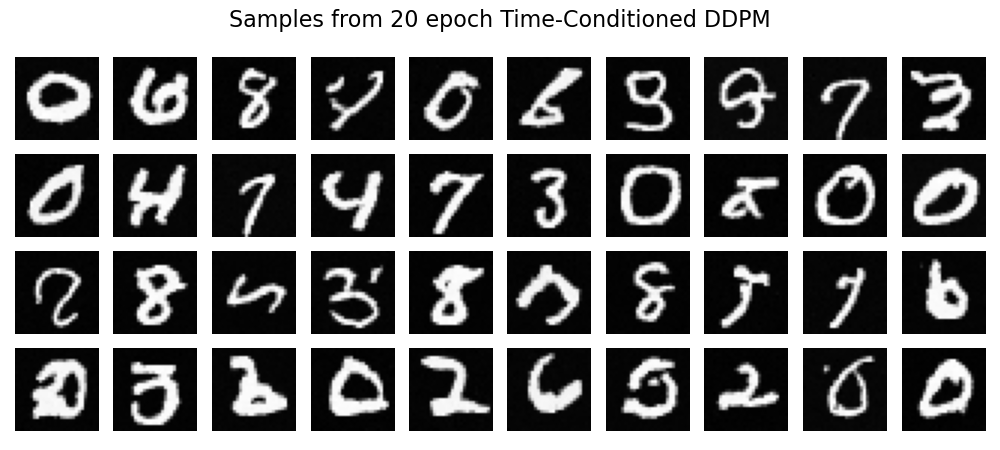
Generated Samples Across Epochs:
Epoch 1:
Epoch 5:

Epoch 10:

Epoch 15:
Epoch 20:
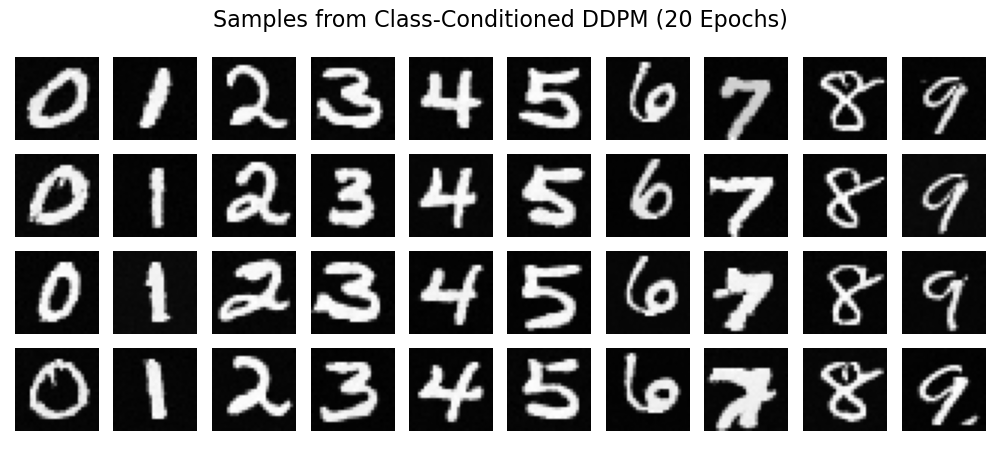
Class-Conditioned UNet #
To further improve the model, I add class-conditioning, allowing the generation of specific digits. Class information is represented as a one-hot encoded vector and processed via a fully connected layer.
Example implementation of the modified architecture:
fc1_t = FCBlock(...) # fully connected blocks
fc1_c = FCBlock(...)
fc2_t = FCBlock(...)
fc2_c = FCBlock(...)

t1 = fc1_t(t) # timestep information
c1 = fc1_c(c) # class information
t2 = fc2_t(t) # timestep information
c2 = fc2_c(c) # class information

# Follow diagram to get unflatten.
# Replace the original unflatten with modulated unflatten.
unflatten = c1 * unflatten + t1
# Follow diagram to get up1.
...
# Replace the original up1 with modulated up1.
up1 = c2 * up1 + t1
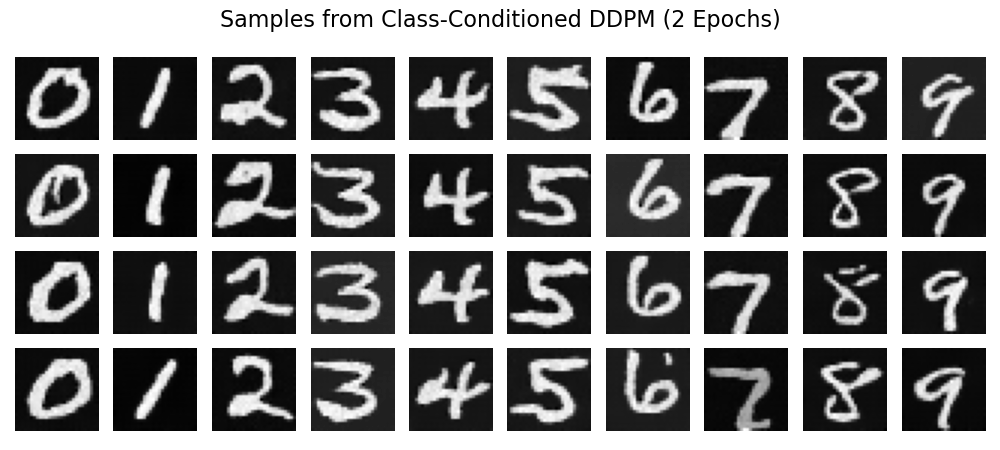
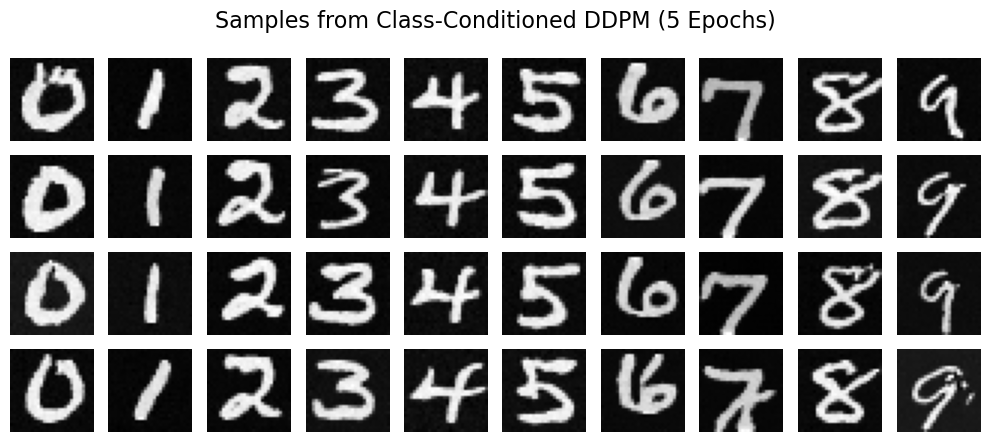
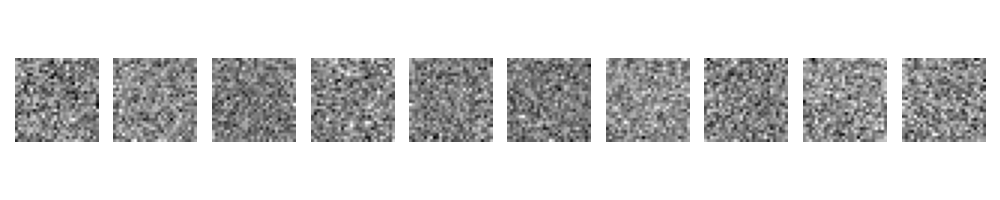
Results #
Here is a gif of the diffusion process!
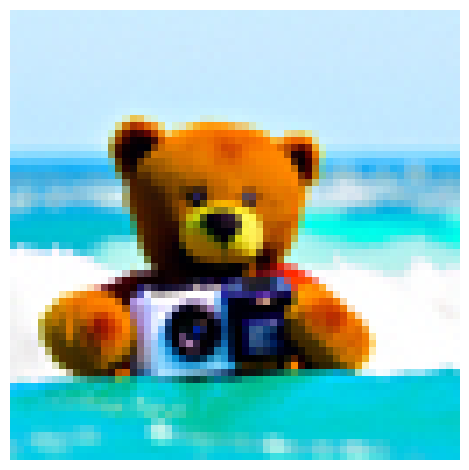
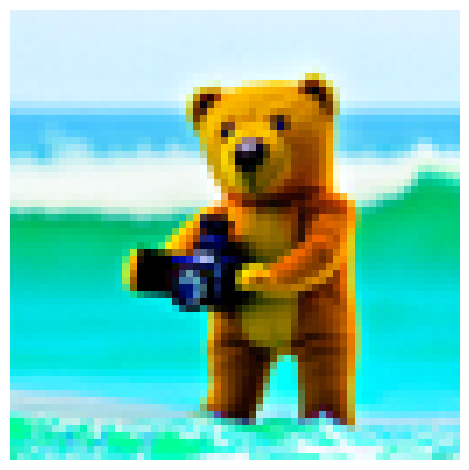
Bonus: CS180 Maskots #
Here are some maskots I generated for the class. The prompt was “a stuffed bear surfing while holding a camera”.